
Cookies and cream ice cream is such a nostalgic flavor – it was my obsession as a kid. And this version has all the nostalgia, but way better flavor!
The base of this ice cream is a salted double vanilla bean custard, with chunky bits of chocolate sandwich cookies folded through. It’s pure heaven!
And the great thing about this recipe is it’s refined sugar-free and dairy-free!

Ingredients for the BEST Homemade Cookies and Cream Ice Cream
- Sandwich cookies: I used Simple Mills cocoa cashew creme cookies for this – they’re basically like refined sugar-free, gluten-free, and dairy-free Oreos.
- Egg yolks: The egg yolks in this recipe not only stabilize the ice cream but also give it a rich and creamy mouthfeel that you can’t replicate with anything else.
- Homemade nut milk: A high-fat creamy homemade nut milk is the key to getting this dairy-free vanilla ice cream to taste like it was made with dairy. To replicate the combo of milk and cream that’s used in traditional ice cream, I used a combo of cashews and almonds in my milk-cream hybrid. The creaminess of the cashews perfectly replicates the richness of heavy cream, and the almonds add protein and structure that you would normally get from 2% milk. That said, if you’re not dairy-free, I’ve also included regular dairy swaps for the nut milk!
- Honey: Feel free to swap the honey for cane sugar.
- Vanilla extract AND ground vanilla: Love the ground vanilla from Beyond Good – it’s so good haha. A whole vanilla bean or vanilla bean paste both work as well in place of the ground vanilla.
- Kosher salt: Specifically, Diamond Crystal kosher salt. If you’re using Morton kosher salt, reduce the salt by half. Morton is much saltier and denser than Diamond Crystal kosher salt.
Kitchen Tools You Need
- Loaf pan or a container to store the ice cream
- A sharp knife for perfectly chopping the cookies without crumbling them.
- A digital scale because it’s the most accurate.
- An ice cream maker (linking the one we’ve had for the past 15 years here that’s phenomenal) or the KitchenAid ice cream attachment which I finally caved and bought (it’s worth it)!
- Large pot
- Medium glass bowl
- Whisk
- Flexible rubber spatula


Ice Cream Making – Everything To Know
Ice cream making is a fairly straightforward process – make the custard, chill the custard, churn the base, freeze the base, and eat. A simple 2 day process!
If you’re looking for step-by-step instructions (with photos) highly recommend reading through this recipe first
That said, I do have a few additional notes.
- Prep the homemade nut milk ahead of time. It’ll make the ice cream-making process a bit smoother and less time-consuming if you already have the milk prepped a few days ahead.
- Freeze your ice cream bowl at least 16 hours (preferably 24 hours) in advance. Otherwise, it won’t be cold enough to properly churn the ice cream.
- Freeze the ice cream after churning for 4-6 hours, ideally overnight. This is the last stage in the ice cream process – yes you can eat it right after churning but it won’t be the right texture. Freezing helps the ice cream firm up and develop even more flavor.
- If you’re not dairy-free, use the cream and milk measurements included in the recipe. While I prefer using honey in this recipe for multiple reasons, feel free to swap it out for regular granulated cane sugar.
- Tempering eggs can be a bit scary if you’re new to ice cream making, but it’s super important, otherwise, they’ll scramble in the hot cream (insert sad face emoji). Watch my video to see how I tempered the eggs.

Important Notes
- Keep the sandwich cookies chunky. I like to quarter the cookies to keep them bite-size but still small enough that they scoop nicely. Keep in mind that the cookies will crumble a bit when you fold them into the ice cream so the chunkier the chop the better.
- Freeze everything. A hot tip from me to you is to freeze everything the ice cream will touch (ok not everything). I like the freeze the container I’ll be storing the ice cream in overnight so the churned ice cream doesn’t melt when it’s transferred out of the ice cream maker/bowl. The reason this is so important (and I swear by this) is the moment ice cream melts and becomes soupy, it’ll re-freeze icy instead of creamy.

Homemade Cookies and Cream Ice Cream
- Prep Time: 30 minutes
- Chill Time: 24 hours
- Cook Time: 15 minutes
- Total Time: 24 hours 45 minutes
- Yield: 1 quart 1x
- Category: Dessert
- Cuisine: American
Description
This homemade cookies and cream ice cream is a combo of salted double vanilla bean ice cream with chunky bits of chocolate sandwich cookies folded through. It’s got all the nostalgia of classic cookies n’ cream ice cream, but way better flavor!!
Ingredients
- 5 egg yolks
- 3 1/4 cups (758 g) homemade nut milk* (if not dairy-free, use 2 cups heavy cream and 1 1/4 cups milk)
- 1/2 cup (155 g) honey (sub with maple syrup or cane sugar)
- 1/2 tsp ground vanilla (sub with vanilla bean paste or 1 fresh vanilla bean)
- 1/2 tsp kosher salt
- 1 tsp vanilla extract
- 16 (192 g) chocolate sandwich cookies, chopped into quarters
Instructions
Make the Homemade Milk
- Make the homemade nut milk by blending together 4 cups (910 g) of water with 1 1/2 cups (215 g) of raw cashews and 1 cup (140 g) of raw almonds on high for 1 minute and 30 seconds or until super creamy and smooth. Strain in a nut milk bag and store in a glass jar. It’ll keep well for 5-6 days so feel free to make this ahead of time.
Make the base
- Infuse the milk. To a large pot, add the cream (or milk and cream if you’re using dairy), honey, ground vanilla, and salt. Heat over medium heat until it just begins to simmer (it should be hot but not boiling).
- Temper the eggs. Carefully scoop out about 1/2 cup of the cream mixture, and whisking the eggs constantly, add the cream to the bowl with the egg yolks. Repeat, adding another 1/2 cup of the hot cream mixture to the bowl of yolks. Whisking constantly, carefully pour the egg yolk mixture into the cream.
- Cook the custard. Swap the whisk for a spatula and stir the custard mixture constantly as it cooks (still on medium-low) until it thickens and coats the back of a spatula or wooden spoon. It’s easier to see if the custard is at the right stage with a wooden spoon. NOTE: Now that the egg yolks are in the pot, keep the heat gentle and low; otherwise you run the risk of the custard breaking (aka the eggs will scramble). So if you’re new to ice cream making, keep the heat low which will slow down the process and it’ll make it easier to watch. It will take longer, but at least you won’t make any mistakes!
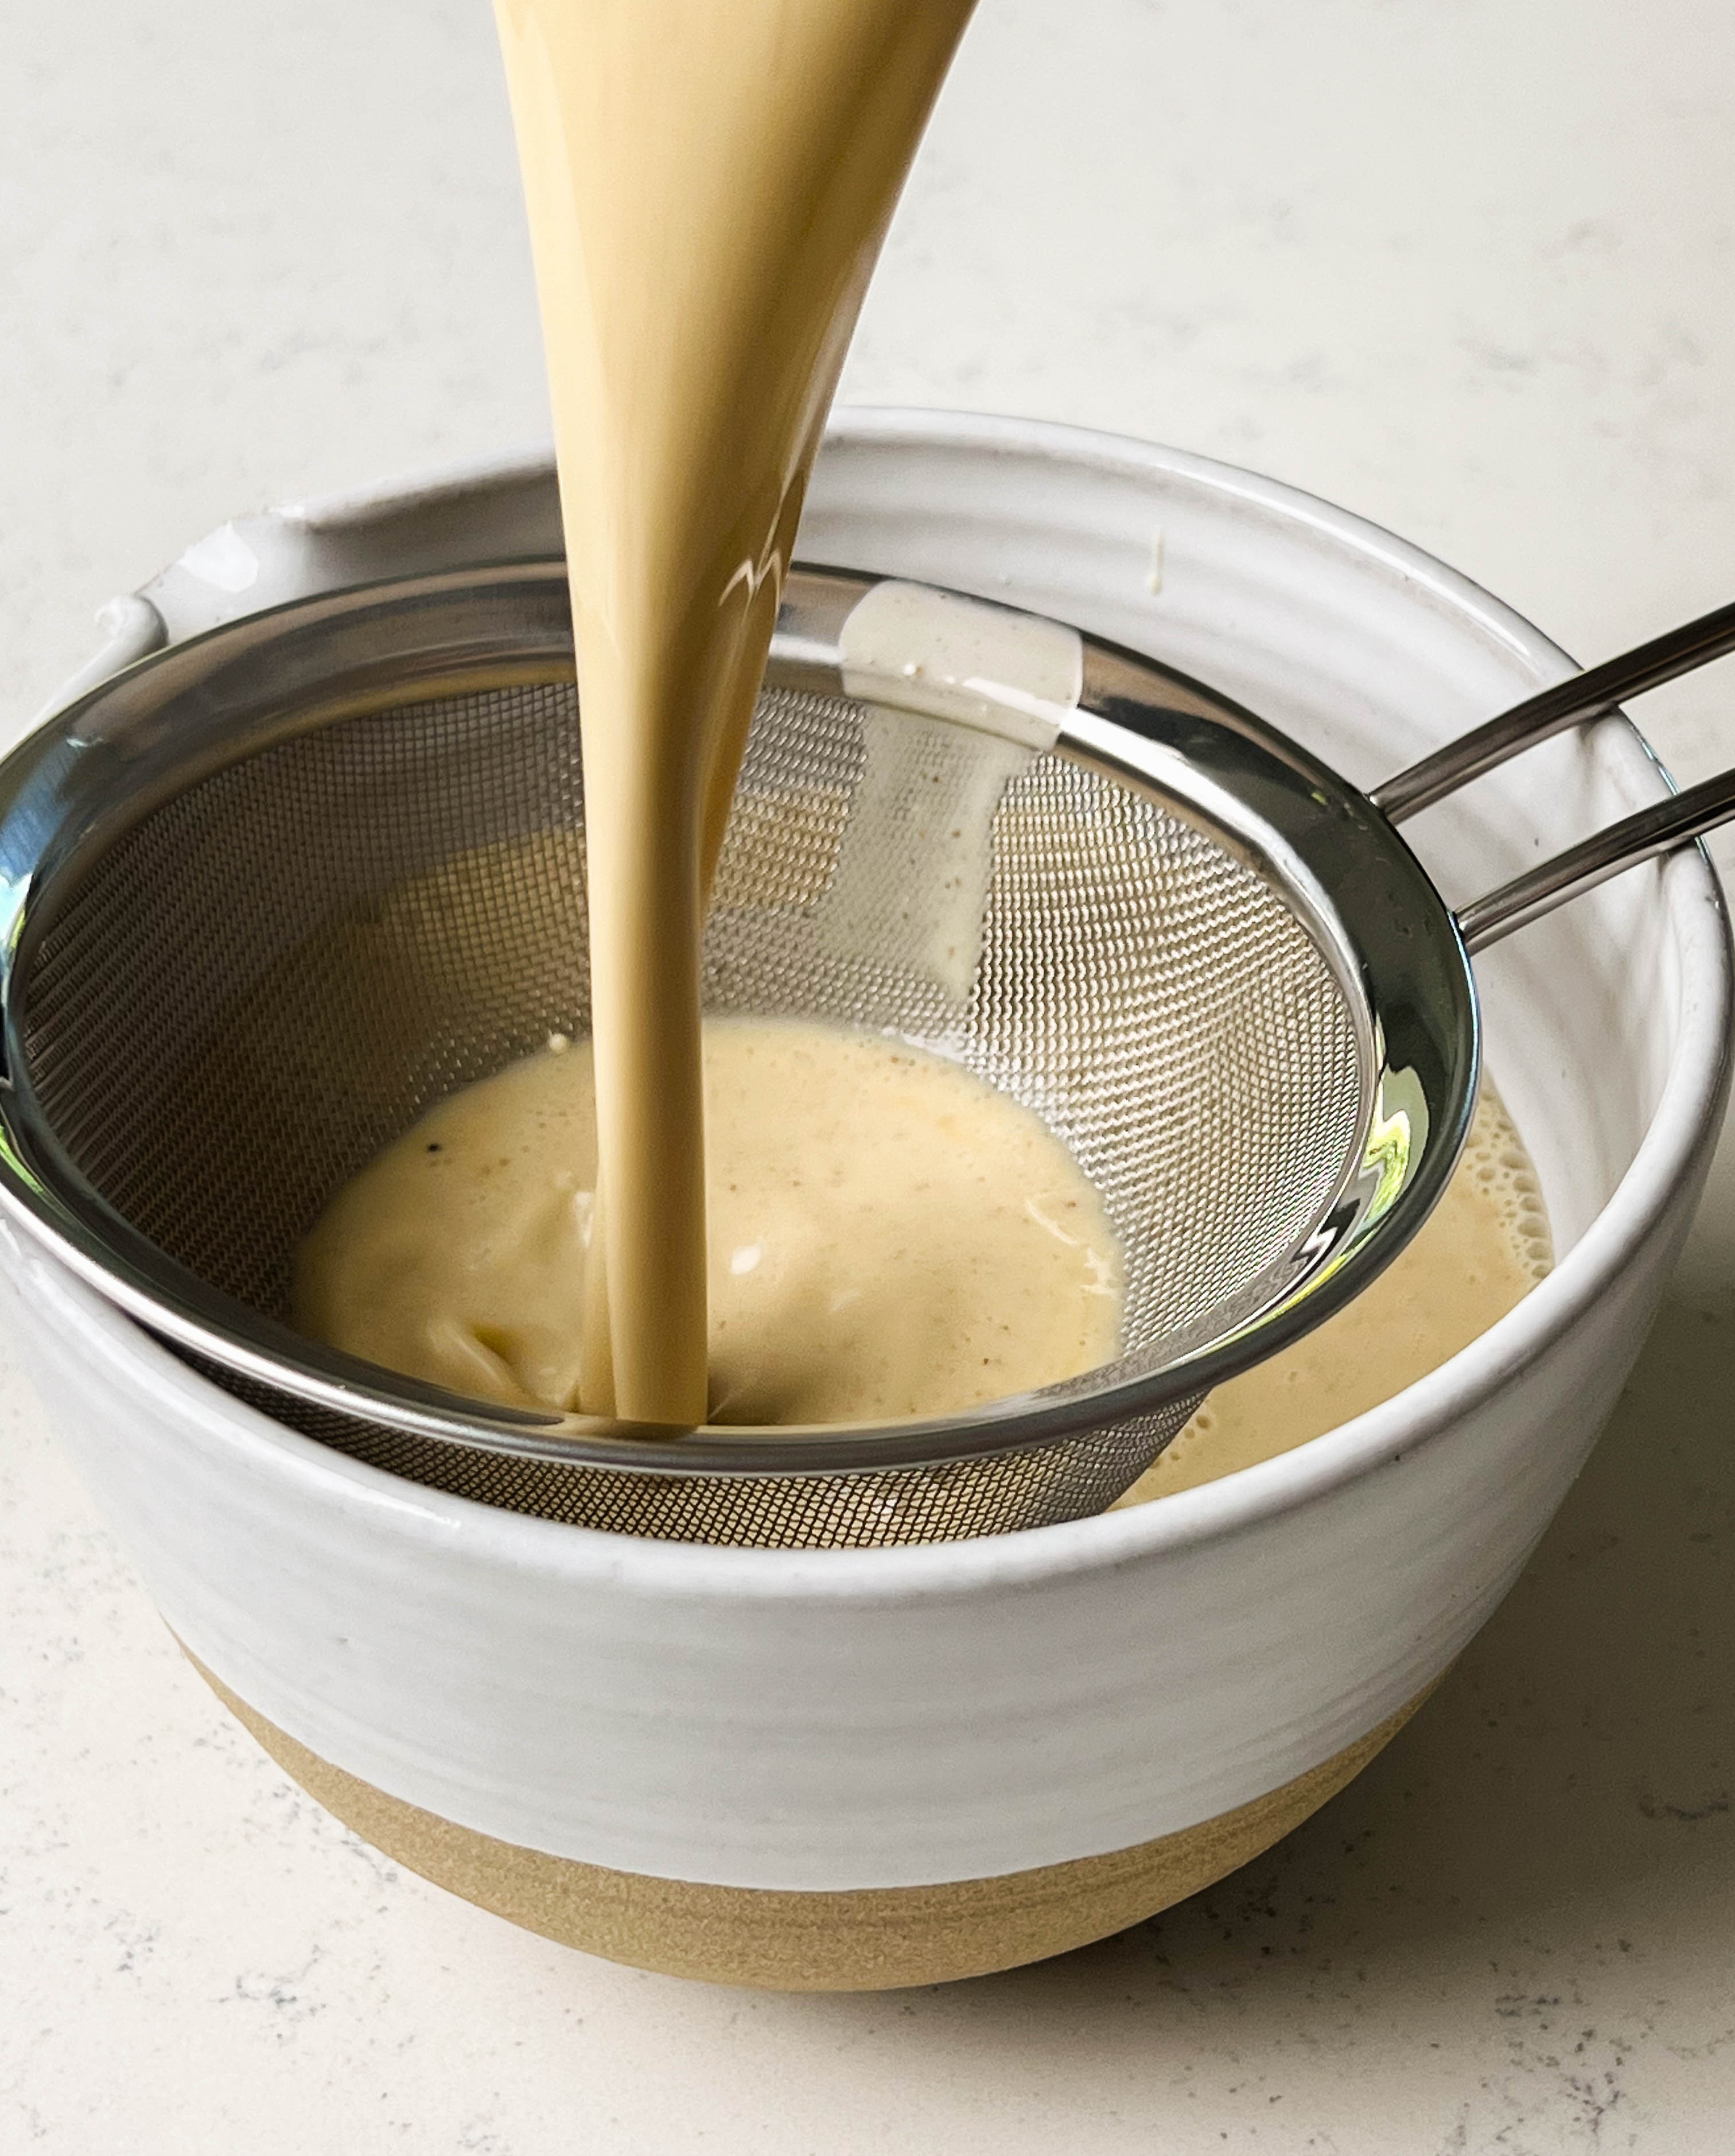
- Strain, ice bath, and chill. Strain the base through a fine mesh sieve into a clean container. Place in an ice bath and stir until room temp. Cover with plastic wrap and place in the fridge overnight to chill.
Churn and freeze
- Churn. Before churning, whisk the vanilla extract into the base. Pour the chilled base into your ice cream bowl and churn according to the manufacturer’s instructions. Mine takes about 20-25 minutes to churn up – it should be the consistency of soft serve. Once done churning, dump in the chopped cookies and fold into the ice cream by hand using a rubber spatula. NOTE: I recommend chopping the cookies when the ice cream is churning so you can move quickly to get the ice cream in the freezer.
- Freeze and serve. Pour the ice cream into your prepared container, smooth out the top, and chill for at least 4 hours, ideally overnight. Scoop and serve whenever you’re ready. For perfectly scooped ice cream, let it sit on the counter for 10 minutes to soften.
Notes
My typical plan for this ice cream is to make the homemade cream and custard base on day one. Then on day two, I’ll churn the chilled base in the morning, and freeze the ice cream so it’s ready just in time for post-dinner dessert! This gives the ice cream about 10 hours to freeze.
This ice cream has a natural yellow-ish hue because of the egg yolks – it’s totally normal!!