Description
This homemade vanilla bean ice cream is made with a custard base, making it perfectly creamy, rich, and silky smooth! Plus, it’s dairy-free, refined sugar-free, and made with whole-food ingredients like egg yolks, homemade nut milk, and honey.
Ingredients
Scale
- 5 egg yolks
- 3 1/4 cups (758 g) homemade nut milk* (if not dairy-free, use 2 cups heavy cream and 1 1/4 cups milk)
- 1/2 cup (155 g) honey (sub with maple syrup or cane sugar)
- 1/2 tsp ground vanilla (sub with vanilla bean paste or 1 fresh vanilla bean)
- 1/2 tsp kosher salt
- 1 tsp vanilla extract
Instructions
- Make the homemade nut milk by blending together 4 cups (910 g) of water with 1 1/2 cups (215 g) of raw cashews and 1 cup (140 g) of raw almonds on high for 1 minute and 30 seconds or until super creamy and smooth. Strain in a nut milk bag and store in a glass jar. It’ll keep well for 5-6 days so feel free to make this ahead of time.
Make the base
- Infuse the milk. To a large pot, add the cream (or milk and cream if you’re using dairy), honey, ground vanilla, and salt. Heat over medium heat until it just begins to simmer (it should be hot but not boiling).
- Temper the eggs. Carefully scoop out about 1/2 cup of the cream mixture, and whisking the eggs constantly, add the cream to the bowl with the egg yolks. Repeat, adding another 1/2 cup of the hot cream mixture to the bowl of yolks. Whisking constantly, carefully pour the egg yolk mixture into the cream.
- Cook the custard. Swap the whisk for a spatula and stir the custard mixture constantly as it cooks (still on medium-low) until it thickens and coats the back of a spatula or wooden spoon. It’s easier to see if the custard is at the right stage with a wooden spoon. NOTE: Now that the egg yolks are in the pot, keep the heat gentle and low; otherwise you run the risk of the custard breaking (aka the eggs will scramble). So if you’re new to ice cream making, keep the heat low which will slow down the process and it’ll make it easier to watch. It will take longer, but at least you won’t make any mistakes!
- Strain, ice bath, and chill. Strain the base through a fine mesh sieve into a clean container. Place in an ice bath and stir until room temp, then stir in the vanilla extract. Cover with plastic wrap and place in the fridge overnight to chill.
Churn and freeze
- Churn. Pour the chilled base into your ice cream bowl and churn according to the manufacturer’s instructions. Mine takes about 20-25 minutes to churn up – it should be the consistency of soft serve.
- Freeze and serve. Pour the ice cream into your prepared container, smooth out the top, and chill for at least 4 hours, ideally overnight. Scoop and serve whenever you’re ready. For perfectly scooped ice cream, let it sit on the counter for 10 minutes.
Notes
My typical plan for this ice cream is to make the homemade milk and custard base on day one. Then on day two, I’ll churn the chilled base in the morning, and freeze the ice cream so it’s ready just in time for post-dinner dessert! This gives the ice cream about 10 hours to freeze.
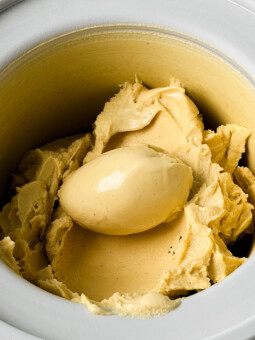
This ice cream has a natural yellow-ish hue because of the egg yolks – it’s totally normal!!