Description
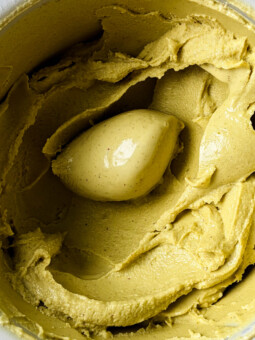
This dairy-free homemade cardamom pistachio ice cream is by far my favorite ice cream flavor – it’s silky smooth, creamy and rich, and perfectly nutty!
Ingredients
- 1 cup (122 g) raw, unsalted, shelled pistachios (also called pistachio nutmeats)
- 90 g (5 large) egg yolks
- 480 g (2 cups) heavy cream and 300 g (1 ¼ cups) milk OR 760 g (3 ¼ cups) homemade nut milk (see below)*
- 175 g honey (sub with granulated sugar)
- 5 cardamom pods, crushed
- 1/2 tsp Diamond Crystal kosher salt
- 1/4 tsp ground vanilla or 1 tsp vanilla bean paste (optional)
Instructions
Homemade Nut Milk
- Make the homemade nut milk by blending 910 g of water with 215 g of raw cashews and 140 g of raw almonds. Start on low and ramp up the speed to 8 (or high) on your Vitamix, blending for 2 minutes total. Strain in a nut milk bag and store in a glass jar. It’ll keep well for 5-6 days, so feel free to make this ahead of time.
Pistachio Butter
- Add the pistachios to a food processor (used the Cuisinart 14-cup food processor). Turn the processor on and let it run. NOTE: I like to add double the pistachios because the processor runs better with more volume. You can save the butter for 3 months and make ice cream again – you’ll want to.
- The pistachio butter will go through 3 phases before it starts forming butter. It’ll go from a flour-like consistency to a wet sand texture, and then it’ll start to clump into a large ball. At this point, stop the processor, scrape it down, and let it run again. Let the butter continue to run – it’ll form a paste and eventually form a smooth but stiff paste after 10ish minutes. Scrape into a jar and store in the pantry.
Custard Base
- Whisk the egg yolks in a small bowl and set aside.
- Add the milk and cream (or homemade nut milk) to a pot, along with the honey, cardamom pods, salt, and ground vanilla (again, the vanilla is optional). Heat over medium heat until hot to the touch or 120°F.
- Scoop about 1/2 cup of the milk mixture out, and, whisking constantly, stream it into the bowl of egg yolks. Repeat this twice more to temper the eggs. Then, whisking the milk mixture constantly, stream in the tempered eggs. Switch to a rubber spatula/large wooden spoon, and stir constantly (I typically stir the mixture every 10 seconds) until it thickens and coats the back of a spoon — temperature should be ~178°F.
- Remove the custard from the heat and whisk in the pistachio butter (you’ll need to aggressively whisk to incorporate the butter).
- Strain the mixture through a fine mesh sieve into a large bowl or pitcher to catch any pistachio bits and cardamom pods. Then place the custard base in an ice bath, stirring constantly until cool. Cover the base with plastic wrap or a lid and place in the fridge overnight. NOTE: If you have a chinois, use that instead of a sieve – it’ll give you the smoothest, silkiest ice cream!
Churn & Freeze
- Pour the chilled base into your ice cream bowl and churn according to the manufacturer’s instructions. Mine takes about 20 minutes to churn up – it should be the consistency of soft serve.
- Scoop the churned ice cream into your container, place a parchment round on top (this helps prevent crystallization), and freeze for at least 6 hours, ideally overnight.
Notes
*A high-fat creamy homemade nut milk is the key to getting this dairy-free ice cream to taste like it was made with dairy. To replicate the combo of milk and cream in traditional ice cream, I used a combo of cashews and almonds in my milk-cream hybrid. The creaminess of the cashews perfectly replicates the richness of heavy creamy, while the almonds add protein and structure that you would normally get from 2% milk.
My typical plan for this ice cream is to make the homemade milk, pistachio butter, and custard base on day one. Then on day two, I’ll churn the chilled base in the morning, and freeze the ice cream so it’s ready just in time for post-dinner dessert! This gives the ice cream about 10 hours to freeze.